I feel very lucky to have got the opportunity to explore Sitecore CDP in the recent past. I was really impressed by the product when it comes to identity resolution, enriched profiles with omnichannel data, tracking digital behavior from multiple channels from real-time audiences, connecting data across, or exporting it to do some campaigns across social media.
So today I thought I would share the experience of how we can achieve user personalization based on products they are browsing using the demo site.
Heart of CDP aka Decision Model (DM)
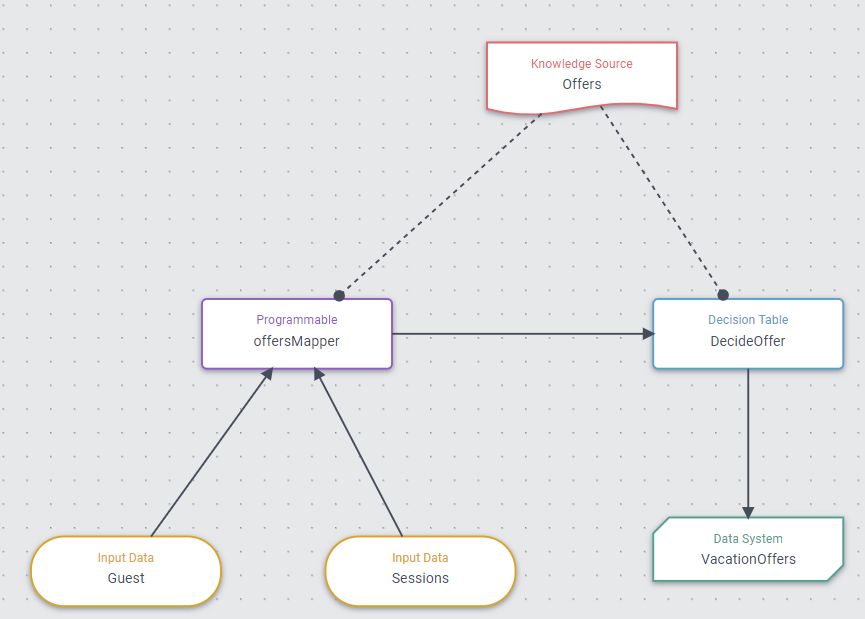
For my demo use case, below is what my DM looks like. We will go through each one about how we set up, configure and see how easy is it to achieve our goal.
Primary components which we actually explore today would be programmable, Decision Table, and Data System from the below snapshot.
Data System Connection: Data system is an external connector that you can use to trigger some action from external sources. This can be either to get some external data or perform action externally. Let’s start with connection to the external system before we actually use it on canvas. Below you can see my connection to json bin where it returns offers based on a unique GUID for each product. Refer to Sitecore Documentation about how to connect to an external system.
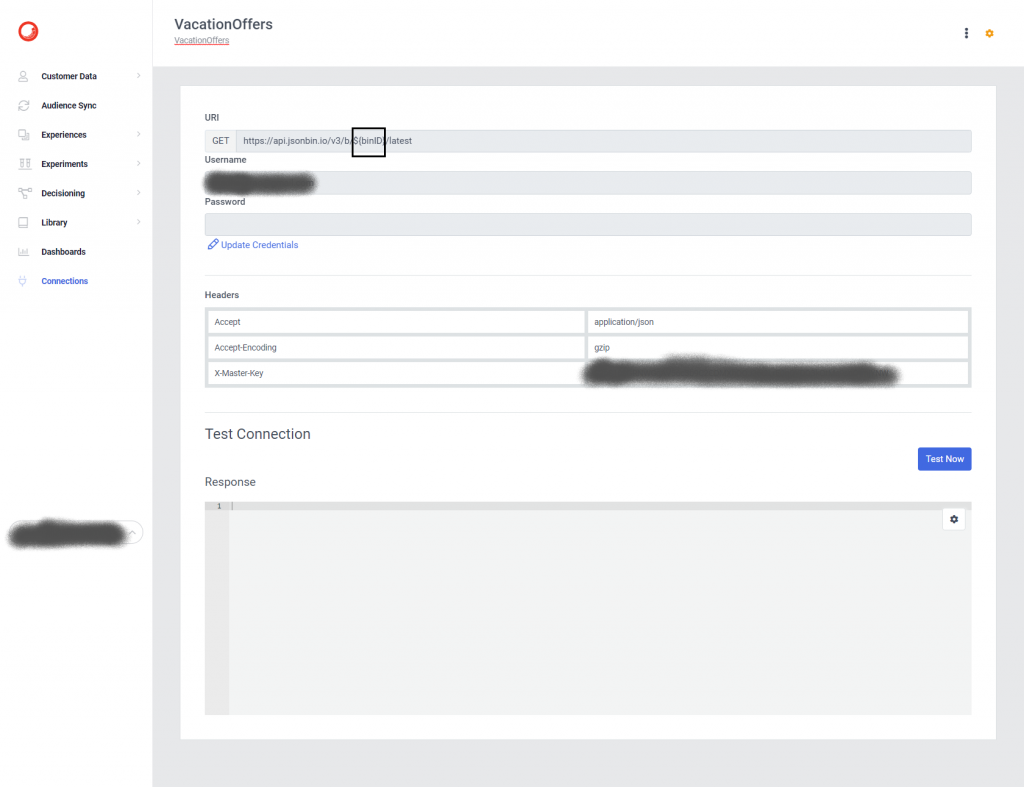
Once you have the connection ready, if you observe the GET request URL we have $(binID) which is a unique binID that our Decision Table will output dynamically and pulls offers using the connection above.
Programmable: This component is where you can write javascript in order to get a logical result. In our case, for demo purposes, I am checking which product page did guest visit (Which can be done in many ways). For that, I just check the Guest’s data extensions created by using the rest API calls (Data extension documentation) and just return the product name as an output string.
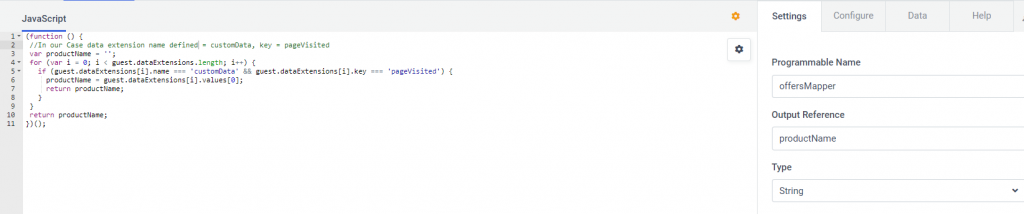
productName from programmable can be “A“, “B“, “C” based on product user viewed is fed into the Decision table as we see in our first snapshot (DM). You can also find examples of programmable decisions in Sitecore documentation.
Decision Table (DT): A decision table is a tabular format that helps in incorporating business rules. As the output of programmable is fed into the decision model we take that as an input column on DT and impose business rules for variants programmable outputs. Our output reference is defined as bindid. For each type of product, I do have a unique Bin ID defined in JsonBin from the first step, hence we just match offers bin id with the product on DT. So after defining all rules in DT below is what it would look like.
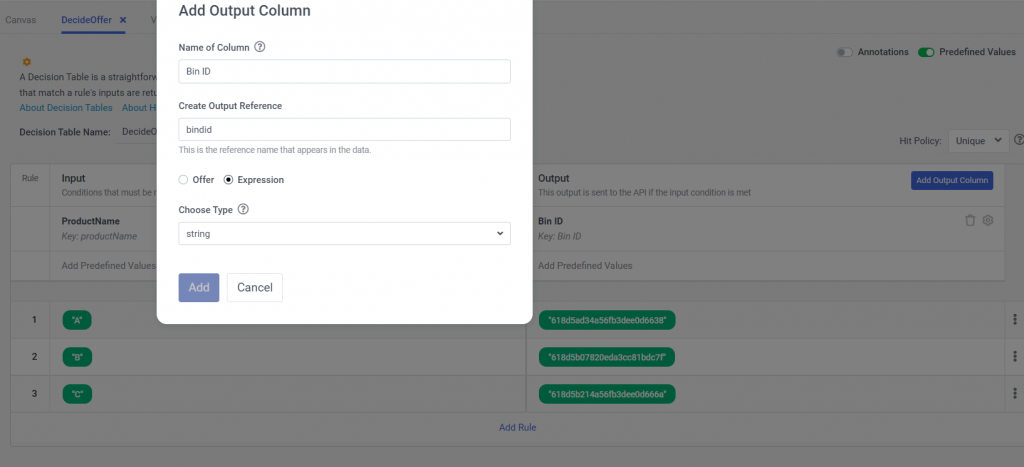
As we Bin ID is output column, for example, if the user visited product A, BinID output would be “618d5ad34a56fb3dee0d6638” from DT which is then fed into Data System. This is the time when the external connector which we created initially comes into the picture.
Data System: When you create a new Data System it would connect to an existing connector that you have created in the first step. (VacationOffers). If we select connection we then provide the output reference from the DT snapshot above.
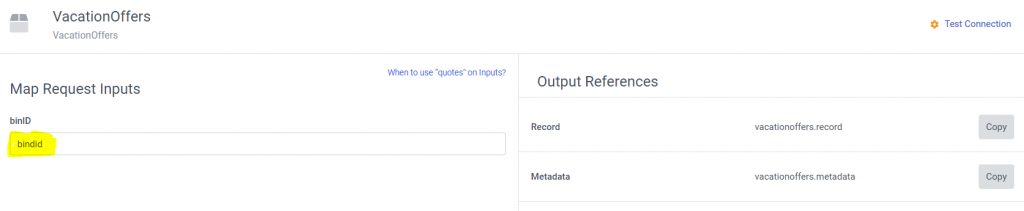
This dynamic bindid value fed from DT will pass on to Data System Connector and replace the GET request URL (https://api.jsonbin.io/v3/b/${binID}/latest) to pull in respective offers from the external system. So final URL would look like – > https://api.jsonbin.io/v3/b/618d5ad34a56fb3dee0d6638/latest
Once these things are done and tested on Test Canvas we now create Web Experience and connect our decision model. For demo purposes, I have used the Glitch site to show the experience.

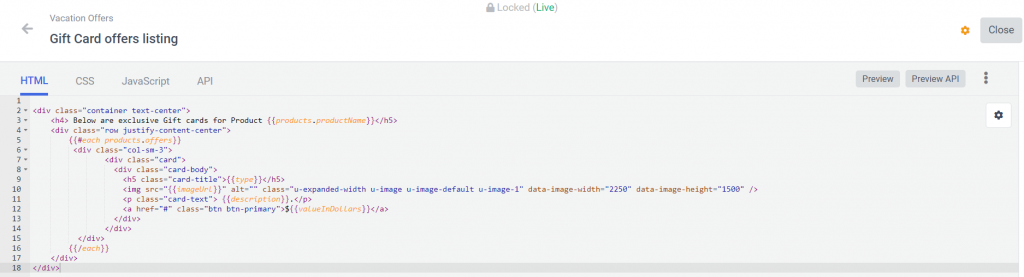
To list offers that I receive from Decision Model, HTML code just loops offers received and displays them on to webpage placeholder.
Once we have all these set up we can preview what the experience looks like on various product pages from the build tab. We can see that we see different offers exclusive to each product.

If you are stuck, feel free to refer to GitHub Source Code for this demo.