Rising competition and Price pressures have made the dynamic business environment compel brands to build a 360-degree customer engagement plan and also drive customers to personalized experiences. Hence brands are constantly competing to provide best-in-class products across all omnichannel.
Sitecore Send (Formerly Moosend) provides the SaaS platform which can perform a variety of digital marketing workloads and makes the platform a one-stop marketing automation solution.

Registration is pretty straightforward, free (Without a credit card), and gets you started within minutes. Once you get started you will be presented with a quick guide screen to create a new mailing list, import subscribers, etc.
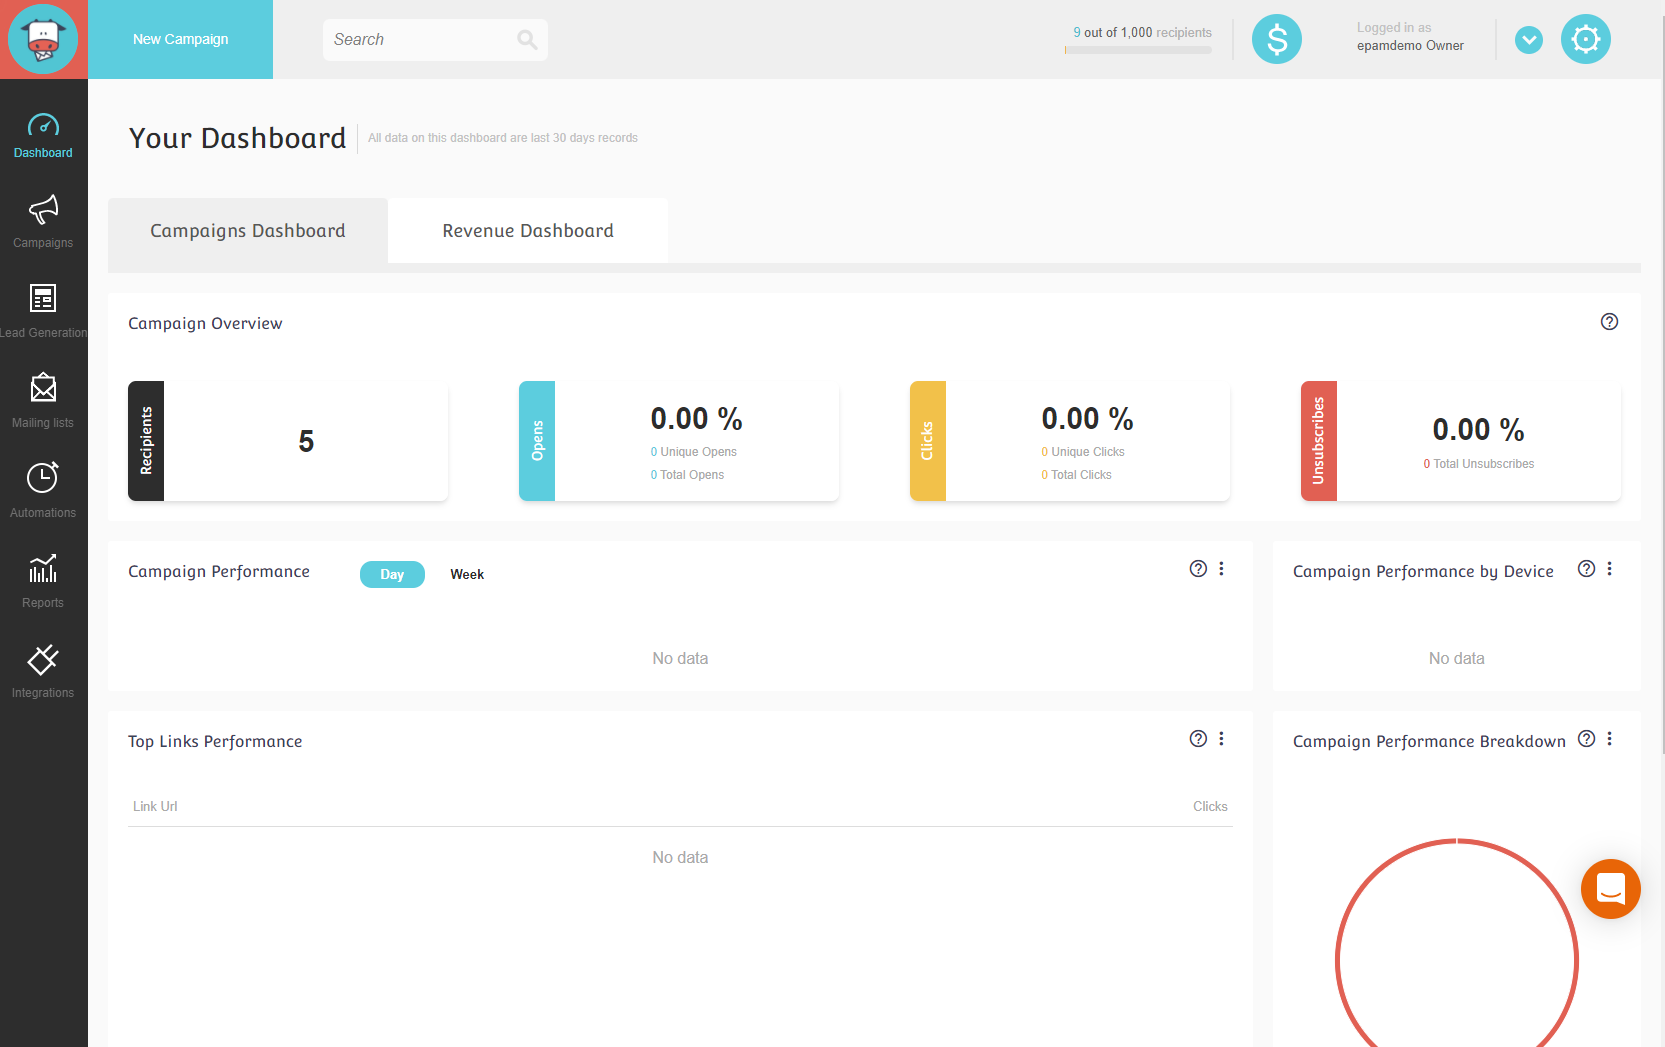
When I had initially started with Send, UI was pretty decent with a left menu which is self-explanatory. Now we have a new UI (old UI will sunset on Jan 11th, 2022 according to alerts when we login) redesigned with a modern touch.

For this part, we will just start with the First menu item which is creating new Campaigns. During new campaign creation, you will be presented with 4 types of Campaigns.

Basic Settings: Once you have campaign type selected for example in our case Regular, we have pretty much self-explanatory steps which we go through for example setting basic settings like Campaign name, Subject line, preview text, From name/Email Address, Reply-To Email, etc
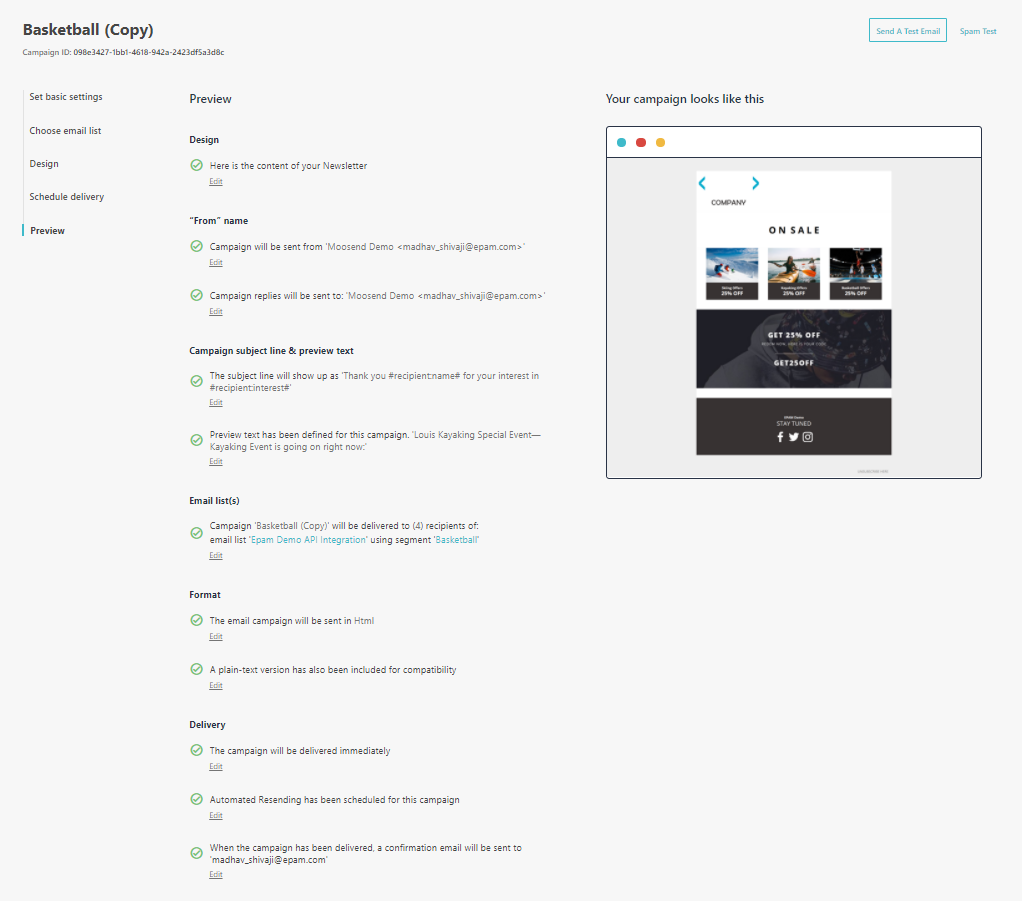
Note: In the Subject line, we can personalize with anything which we would like to with those fields which are available in Send. (#recipient:name# picks up a respective subscribed user name and replaces it individually during the campaign)

Choosing Email List: Next Step requires an Email list (Email list can be classified further into segments) to be selected that can be created and imported with subscribers either manually or from one of the following sources :

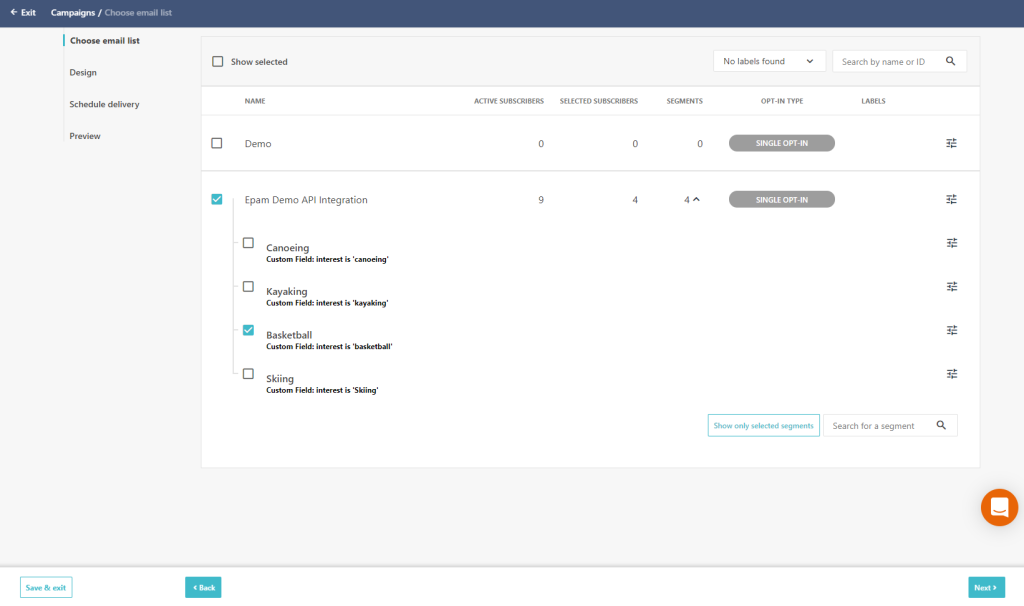
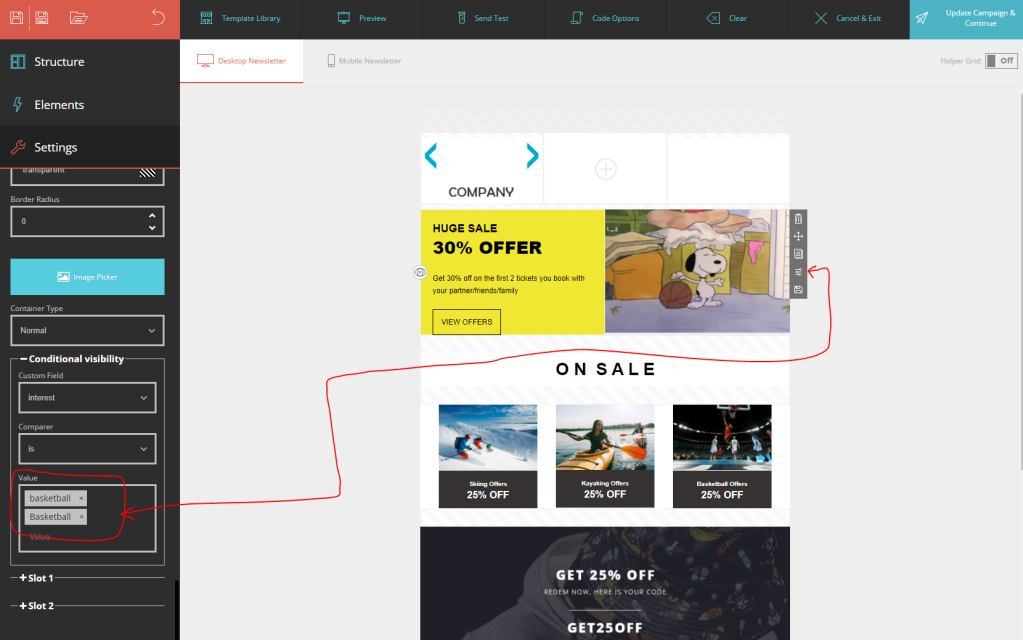
Designing Template: You can choose a custom design template and personalize it according to your needs. The editor looks slick and easy to use for marketers. For my scenario, I have a basketball gif running only if subscribed contact has an interest in ‘basketball’.
Schedule Delivery: You can easily schedule your campaign by selecting a switch that best works for your campaign. Again note that you can personalize the Campaign subject line.

Preview: Before you can actually start the campaign it allows you to preview how your email campaign looks like and also allows you to send a test email.

If we need to view the report on an individual campaign then we just go to the required campaign from the list of campaigns and click on the “view report  ” icon available. Once the report loads you will be able to see the Performance overview, Recipient activities. You can track clicks links on the campaign, recipient clicks, performance per link, devices, email clients, and activity by location

No doubt Sitecore Send will be the most valuable product for marketers and customers will prefer Sitecore Send over traditional Sitecore EXM.
In the next part, we will go over Email Lists creations.