
Introduction:
In today’s world, having visually appealing and engaging content is essential to stand out from the competition. DALL-E, an AI model developed by OpenAI, generates unique images from textual descriptions. In this blog post, we’ll explore how to generate DALL-E AI images using PowerShell scripts in Sitecore, which can help to enhance your website’s visual content and improve user engagement.
This post is inspired by Filip Jonsson who wrote a wonderful article about generating AI images using Custom commands and now I wanted to make it yet easier to run using Powershell script.
Prerequisites:
Before we start, ensure that you have the following prerequisites in place:
- Sitecore instance up and running
- Sitecore PowerShell Extensions (SPE) module installed
- DALL-E API key
Step 1: Setting up DALL-E API
To start, you need to create an account on the OpenAI website ( https://openai.com/api/ ) and manually generate an API key to access DALL-E. Once you have your API key, you can set it up in your PowerShell script to communicate with the DALL-E API.
Step 2: Writing the PowerShell script
Now, we need to write a PowerShell script that will automatically call DALL-E Api and consume response URLs of images. The script should take a textual description as input for image search, the width and height of an image, another text input to specify the number of images to be generated and use the DALL-E API to generate an image/s that corresponds to the input. Here’s an outline of the PowerShell script that we will use :
# Set up the DALL-E API key
$apiKey = "your-api-key"

# Set up the API endpoint
$apiEndpoint = "https://api.openai.com/v1/images/generations"

# Set up the textual description
$text = "a yellow and green bird with a long beak and short tail"

# Set up the payload
$payload = @{
  "model" = "image-alpha-001"
  "prompt" = $text
  "num_images" = 5
  "size" = "512x512"
  "response_format" = "url"
} | ConvertTo-Json

# Set up the headers
$headers = @{
  "Authorization" = "Bearer $apiKey"
  "Content-Type" = "application/json"
}

# Invoke the API
$response = Invoke-RestMethod -Method Post -Uri $apiEndpoint -Body $payload -Headers $headers

# Loop items received
$response.data | ForEach-Object {

    # Get the image URL from the response
    $imageUrl = $_.url

    # Display the image
    Write-Host "Image URL: $imageUrl"
}
This script just sets up the DALL-E API key, API endpoint, payload, and headers, and then invokes the API to generate images. The image URL is then retrieved from the API response and displayed on the console.
Step 3: Integrating the PowerShell script with Sitecore
Once we have the above script working that brings in images from DALL-E API, we then need to enhance the script to do a couple of things:
- Get Inputs for payload from Dialog/Modal.
- Download each received URL Async into the memory stream and load into a specified folder in the media library.
- Create a button using “Integration point Library” either on one of the Ribbon Menu items or the Context menu based on usage. Copy the working script under chosen path.
- Trigger from Ribbon Menu or Context menu.
For my case, I created a button under the Developer tab and it looks like this :

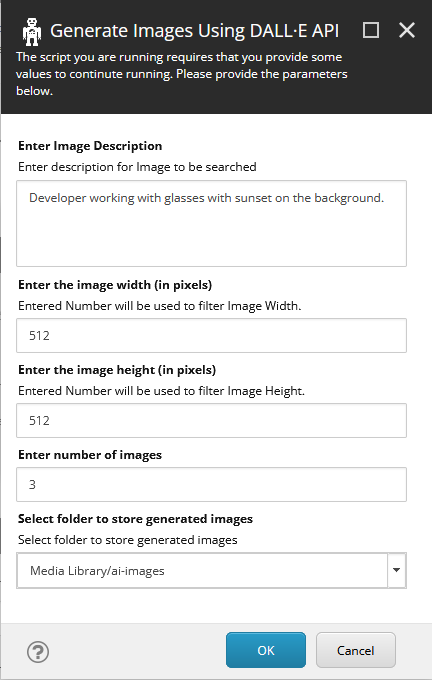
After clicking that button, the Modal dialog shows as below, and let us also assume we filled up the fields as shown:
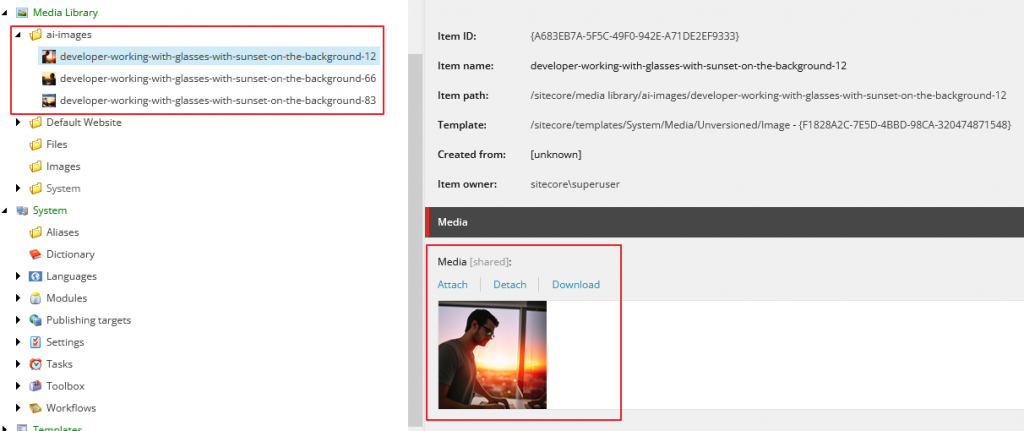
Finally, a couple of seconds later you will see images right in the folder specified.
Conclusion:
In this blog post, we explored how to generate DALL-E AI images from PowerShell scripts in Sitecore. By integrating DALL-E with Sitecore, you can enhance your website’s visual content and improve user engagement. With this script, you can generate images for products, services, or any other content that you want to highlight on your website.